 +86-13646196162
 info@hysonindustry.com




 русский
  عربى
عربى 


What Should Be Confirmed Before Climbing on a Scaffold? A Safety Guide
 2026.09.25
Content
- 1 The First Check: Wheel Brakes and Locking Casters
- 2 Foundation, Base Plates, and the Ground Beneath You
- 3 Frames, Rosettes, and Couplers: What to Verify Above the Base
- 4 Platform Planks, Guardrails, and Fall Protection
- 5 Environmental and Electrical Safety Around the Scaffold
- 6 Tags, Training, and the Competent Person
You are standing at the base of a scaffold, morning light catching the frames, and your day starts with one simple decision: is this structure ready for someone to climb? The single most important confirmation is that the wheel brakes are locked in place—that is the answer most safety programs want you to give. But a professional pre-climb check goes much further. It also verifies the foundation, the connections, the platforms, the guards, the environment, and the people involved. This guide walks through each of those areas so that the phrase "what should be confirmed before climbing on a scaffold" becomes a complete routine, not a one-line test answer.
The First Check: Wheel Brakes and Locking Casters
If the scaffold is mounted on casters, start with the wheel brakes. A rolling scaffold that moves even a few centimeters while a worker is above it can topple the entire structure. The brakes must be engaged on every wheel, not just the two on one side. Press the pedal down until the brake pad makes firm contact with the wheel surface, and give the wheel a slight push to confirm it does not turn.
- Confirm that all four casters are locked, not only the front two.
- Check that the brake pedal holds its position and does not spring back.
- Verify that each caster is free of mud, paint, or debris that would reduce braking friction.
- On systems with outrigger stabilizers, confirm the stabilizers are deployed and secured.
Wheel brakes matter most on mobile scaffolding used for interior work. On a stationary scaffold, the equivalent check is stability: the scaffold must not rock or shift when you push the top rail.
Foundation, Base Plates, and the Ground Beneath You
A scaffold is no stronger than the surface it stands on. Confirm that the ground is compact, level, and capable of supporting the intended load without settling or washing out. Soft soil, a freshly graded slope, or a trench edge can cause a sudden shift after the first few workers climb up. Look for standing water, cracks, or signs of previous movement.
Check every base plate and screw jack. Base plates must be flat and in full contact with the ground. If the scaffold uses adjustable legs, inspect the jack base for bent threads, a cracked weld, or missing retaining pins. The amount of exposed screw should stay within the manufacturer's limit—usually no more than half the length of the screw remains adjustable. If you see a base plate resting on a brick, a loose block, or another improvised support, stop the climb and report it.
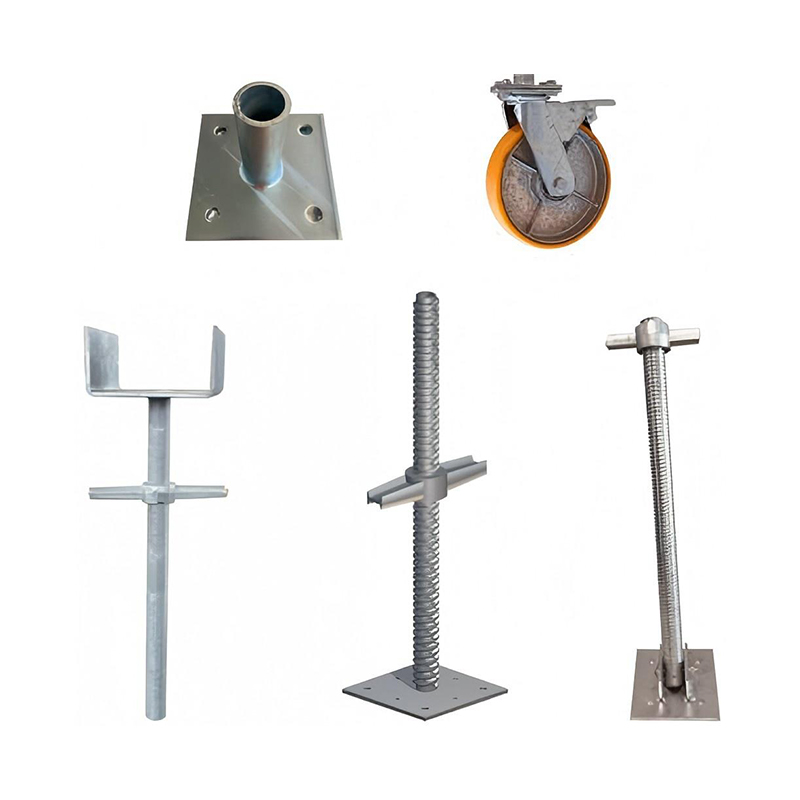 Adjustable Jack Base for Scaffold LevelingThis threaded jack base provides precise height adjustment up to ±1mm to compensate for uneven ground, ensuring a stable foundation for ringlock and cuplock systems and preventing settlement issues.View Product →
For ringlock and cuplock systems, the same rule applies: the vertical post sits in a base that transfers load to the ground. Any settlement under the base will pull the whole lattice out of plumb.
Frames, Rosettes, and Couplers: What to Verify Above the Base
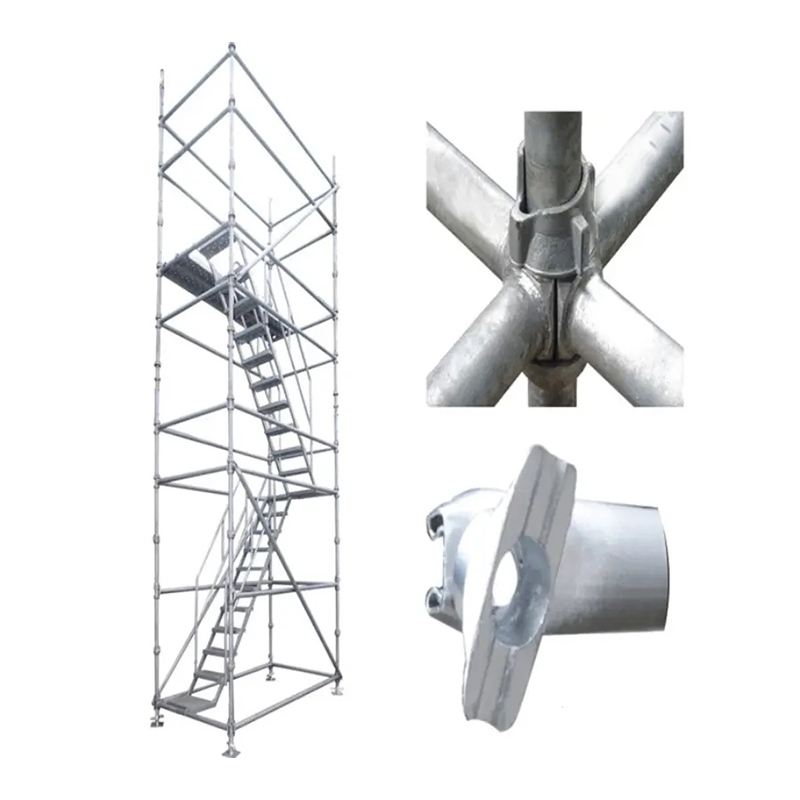
Once the base is solid, move your eyes up the scaffold. Every frame and brace must be free of deformation, rust-through, and cracks. A bent frame changes the geometry of the scaffold and creates unintended eccentric loads. Look for dents, bulges, or damaged welds at joints. On a ringlock scaffold, inspect the rosette nodes: the locking wedges must be fully driven in and tapped down with a hammer, not left loose or missing. On a cuplock scaffold, open the cup completely and confirm the ledgers are seated before closing and hammering the cup.
- Verify that frames are vertical and braced according to the manufacturer's layout.
- Inspect all couplers and clamps; tighten any that are loose, and replace any with worn threads.
- Check that pins and springs are present at all frame-to-frame connections.
- Look for corrosion in the form of red rust powder or pitting—this weakens load-bearing sections.
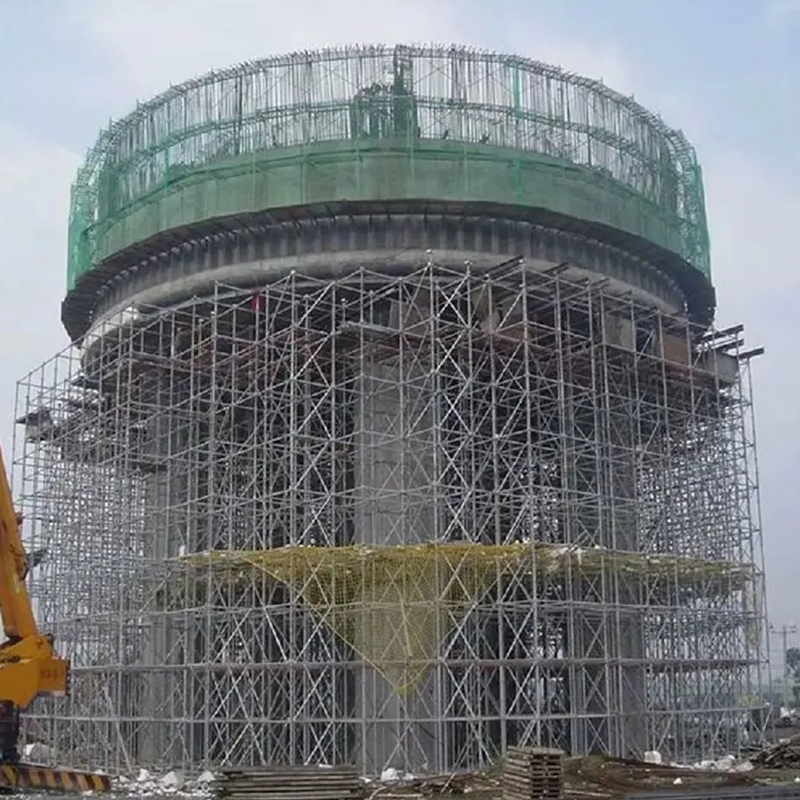 Ringlock Scaffolding with Rosette CouplersEngineered for heavy industrial projects, this system uses high-strength Q345B steel and hot-dip galvanizing for durability. Its quick-locking rosette nodes reduce setup time by 50%, and every joint must be fully secured during inspection.View Product →
Diagonal bracing is not optional. It prevents the scaffold from racking when wind or workers apply lateral forces. If a brace is missing or damaged, the scaffold should be tagged out until it is replaced.
Platform Planks, Guardrails, and Fall Protection
You can stand on a perfectly framed scaffold and still be at risk if the platform is incomplete. Confirm that all planks are in place, fully decked, and secured against movement. Walk each plank or visually inspect from below for splits, knots, and discoloration. Gaps between planks should be wide enough to avoid pinch points but narrow enough to prevent tools from falling through—typically no more than one inch. End overhangs must be within the range specified by the manufacturer, usually between six and twelve inches.
Guardrails are the second line of defense. The top rail should be around 42 inches above the platform, with a mid rail at roughly half that height. Toe boards along the edge stop spools, wrenches, and rebar from becoming dropped objects. The table below summarizes what to look for:
| Component | Typical Requirement | Why It Matters |
|---|---|---|
| Plank gap | ≤ 1 inch | Prevents slips and dropped tools |
| Top rail height | 38–45 inches | Stops workers from toppling over the edge |
| Mid rail | Half the height of top rail | Closes the opening for smaller workers and tools |
| Toe board | ≥ 4 inches high | Prevents items from falling to the floor below |
| Ladder extension | ≥ 3 rungs above platform | Provides secure handhold when stepping off |
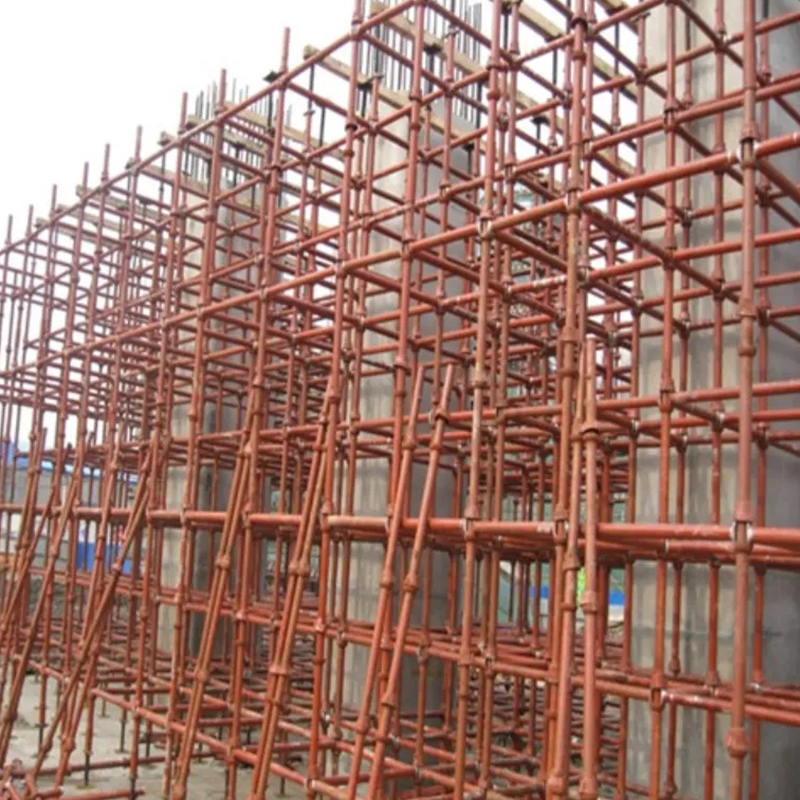 Cuplock Scaffolding with Cup Locking NodesFeaturing a cup-shaped mechanism that secures up to four horizontals with one hammer strike, this modular system eliminates loose parts and boosts erection speed by 30–50%, making it ideal for high-load bridge formwork and industrial maintenance.View Product →
Whatever scaffold system you are using—ringlock, cuplock, or a custom frame—the platform rules are the same. Fall protection is non-negotiable on any scaffold over a dangerous drop height. If a personal fall arrest system is required, check the harness for wear, ensure the lanyard is long enough for the work zone, and confirm the anchor point is rated for the load.
Environmental and Electrical Safety Around the Scaffold
The structure might be sound, but the air around it can still be deadly. Confirm that weather and electrical conditions won't turn the scaffold into a hazard before anyone climbs.
- Check wind speed. When gusts reach the strength listed in the manufacturer's instructions—or when you cannot control loose materials—stop scaffold work.
- Look for rain, ice, snow, or frost on the planks. Wet surfaces reduce traction and make it easy to slip under a guardrail.
- Inspect the area for power lines. Keep metal scaffolds a safe distance away from unguarded energized cables; the required clearance depends on your local code, but the default should be at least 10 feet for voltages used on most construction sites.
- Identify the nearest electrical grounding path. Bonding and grounding requirements apply if welding is done from the scaffold.
Also check the surrounding environment for vehicle traffic, moving equipment, and overhead cranes. A scaffold that is protected by barricades and warning signs is safer for everyone.
Tags, Training, and the Competent Person
Finally, confirm that the scaffold has been inspected and that you are authorized to use it. A scaffold tag is not paperwork—it is a visual signal of a completed inspection. A green tag usually means safe for use; red or yellow tags mean restricted, incomplete, or unsafe. If you see no tag, or the tag is faded, ask the supervisor before climbing.
Initial and daily inspections must be performed by a competent person—someone trained to identify hazards and with the authority to correct them. If you are responsible for the inspection, follow the four main scaffold types and their typical weak points. If you find damage, remove the scaffold from service immediately and report it.
Training is your last layer of protection. Never climb a scaffold unless you have been taught how to erect, use, and inspect the specific system on site. This includes knowing how to tie off, how to safely carry tools, and how to use the access ladder. For scaffold systems built to BS1139 and EN74 standards, a trained eye sees the difference between a minor cosmetic mark and a load-bearing defect. Our own cuplock and ringlock systems, for example, are manufactured to these international safety benchmarks, so the inspection points you practice apply directly to real production equipment.
Before you step onto any scaffold, run through the sequence: wheel brakes locked, foundation solid, framing intact, deck and guards in place, environment clear, and inspection tag current. The official answer to "what should be confirmed before climbing on a scaffold" is the wheel brakes—but a complete pre-climb routine is what gets you home safely. If you are planning a project and need a scaffold system that is easy to inspect and built to recognized standards, talk to an experienced manufacturer early in the design phase. Contact our engineering team to discuss your load requirements, site conditions, and access needs.


- Location
- Group 3, Fangzhuang Village, Rucheng Subdistrict, Rugao City, Nantong, Jiangsu, China
- Follow us
- Phone
- +86-13646196162
- info@hysonindustry.com
